


I really can't believe its been a year since we closed on our house and started renovating. On the one hand the time has really flown by, and on the other it feels like we've lived here a decade. The first few months were such a struggle. We remodeled every square foot of this house so we really couldn't unpack anything for months. We worked from room to room with chaos everywhere. I definitely wouldn't recommend this strategy for everyone, but we were able to save a lot of money and invest into our home without going into debt.
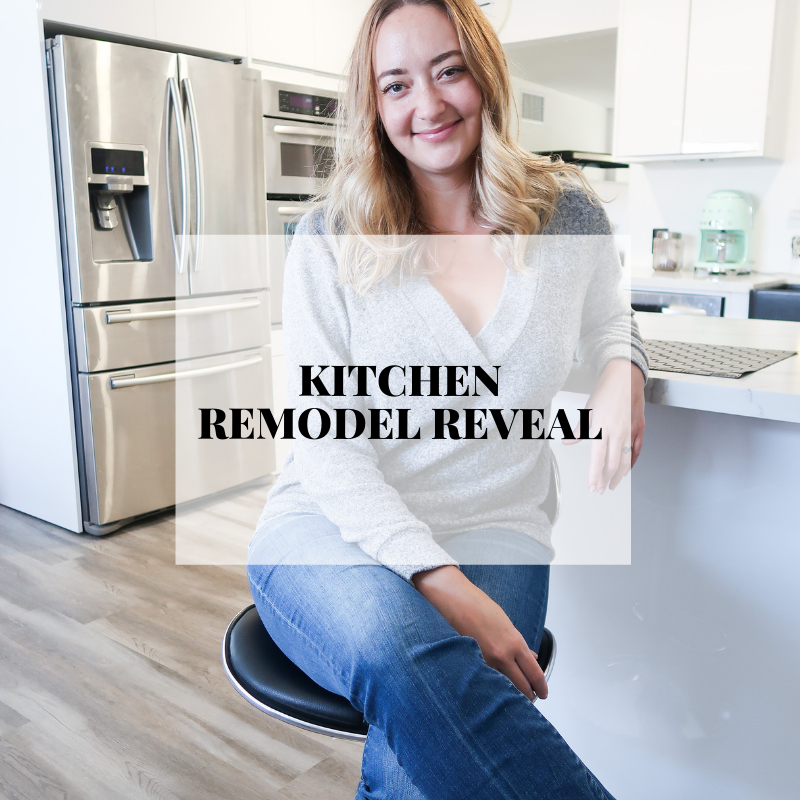
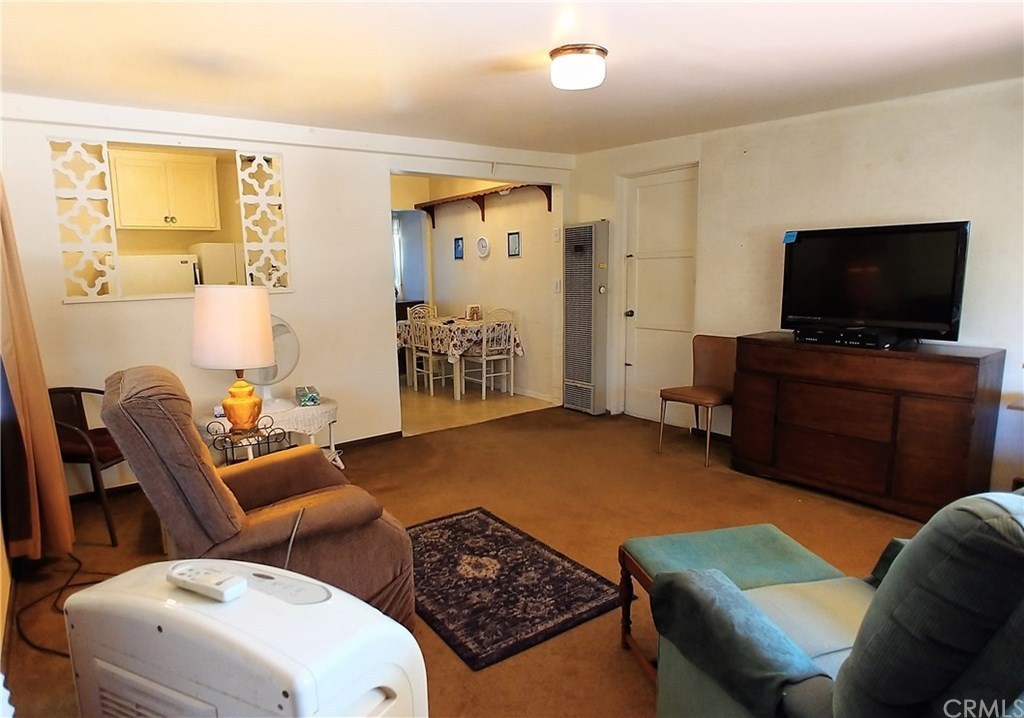
The room that absolutely took the longest and most work was the kitchen/dining room area. Aside from being the most time consuming and literally taking everything out (including walls!) and starting from scratch, some of our cabinets were on backorder and took an additional 6 months to arrive due to covid. We finally got the remaining cabinets in September (that we ordered in February) and everything is installed. We still have a few finishing touches left to do, like a backsplash (which I need help from you guys picking out!) But first, keep scrolling to see the before and afters! Before
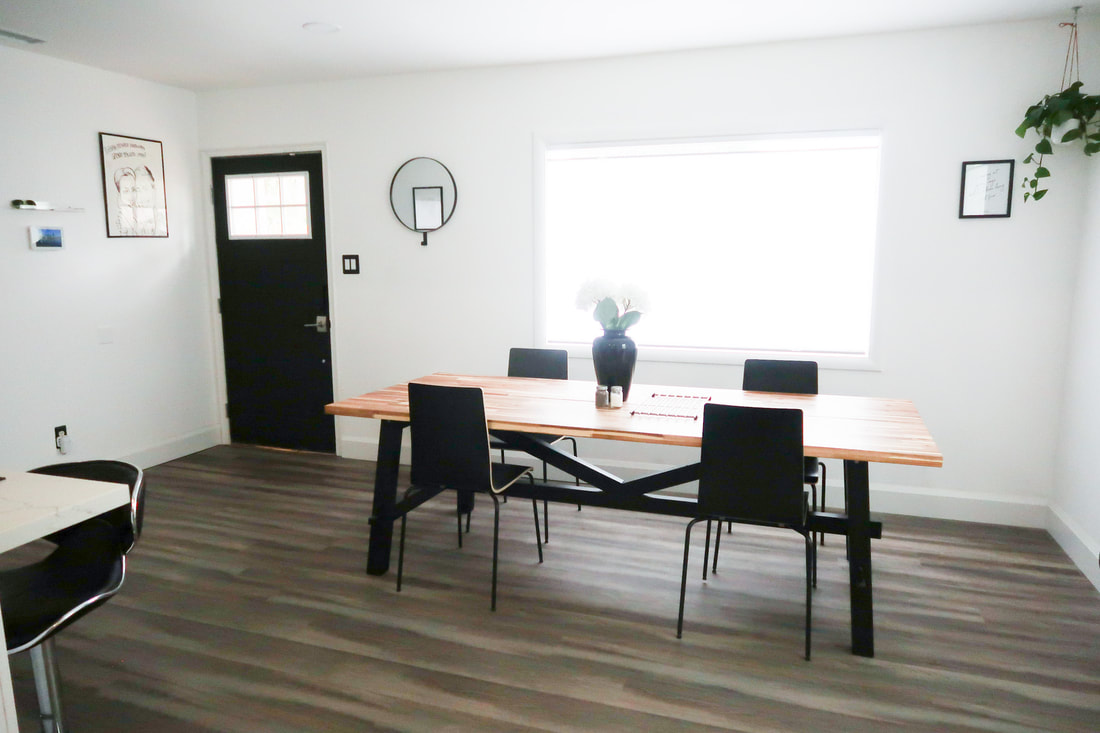
After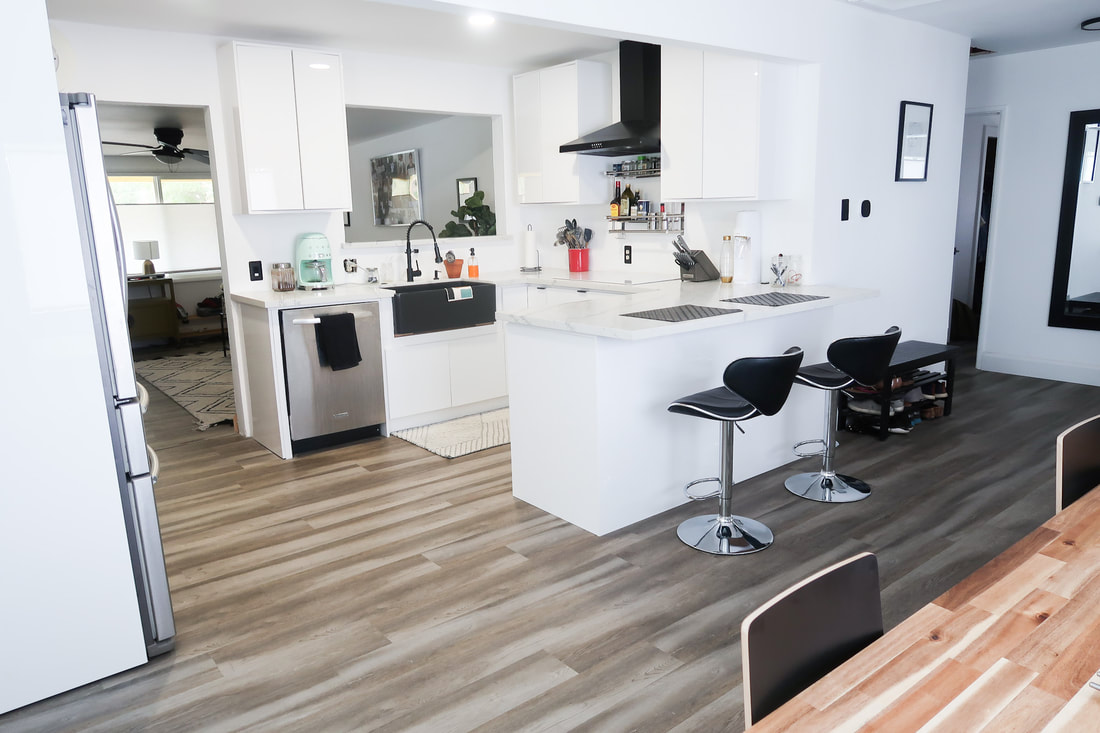
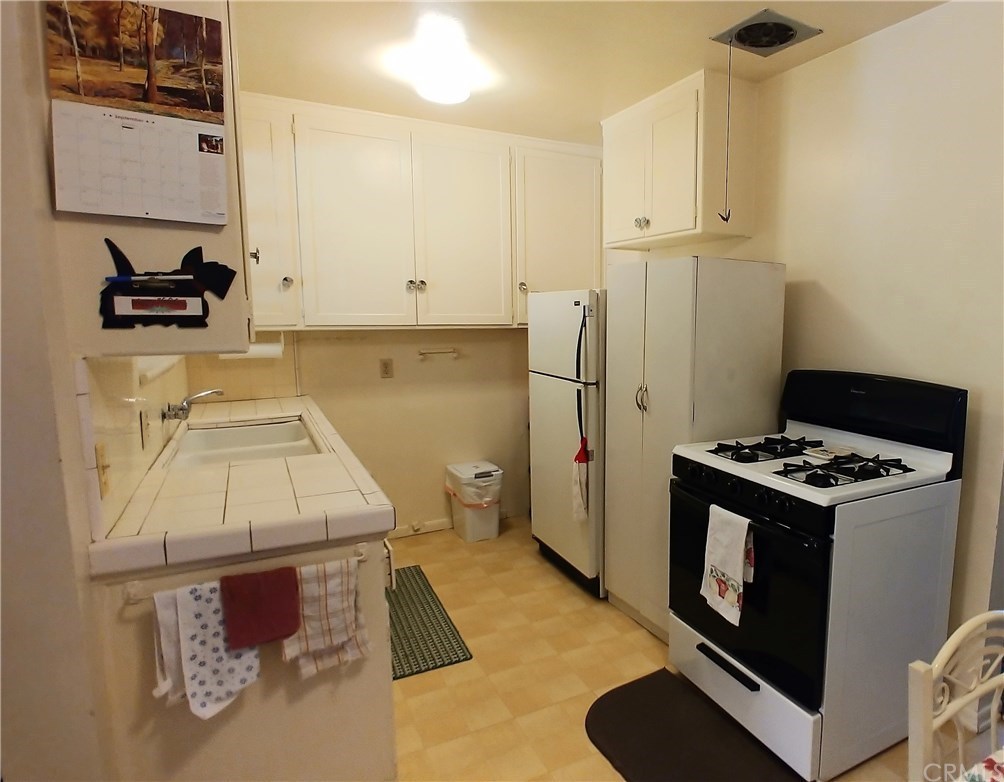
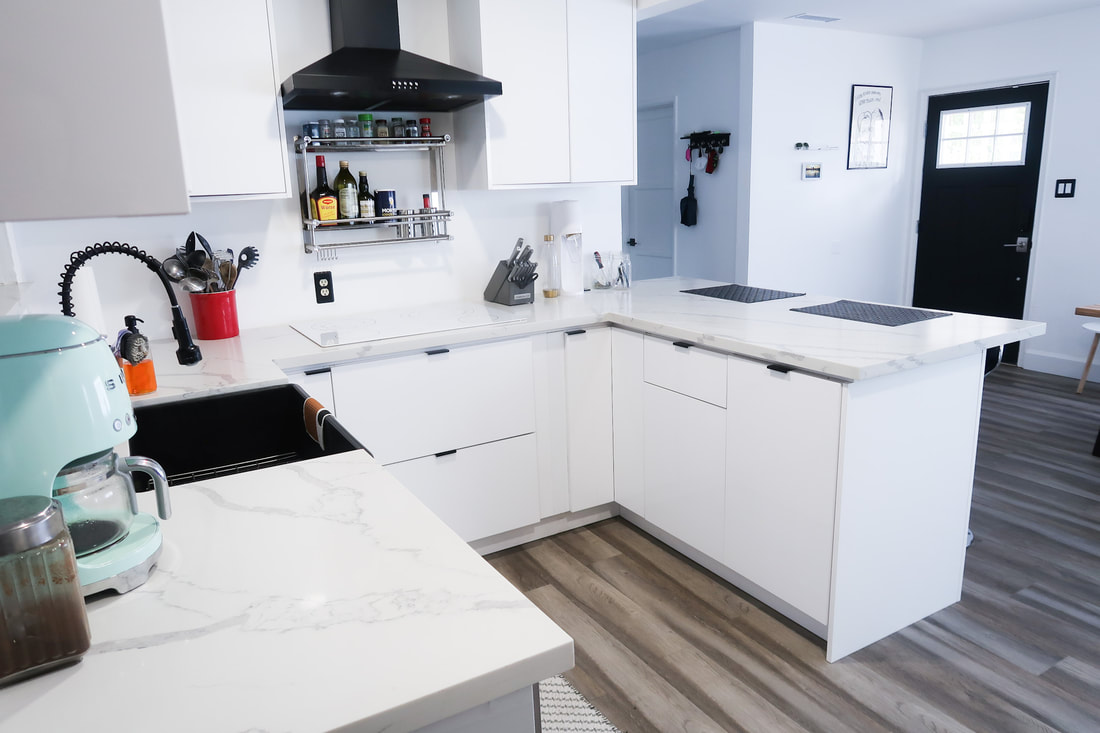
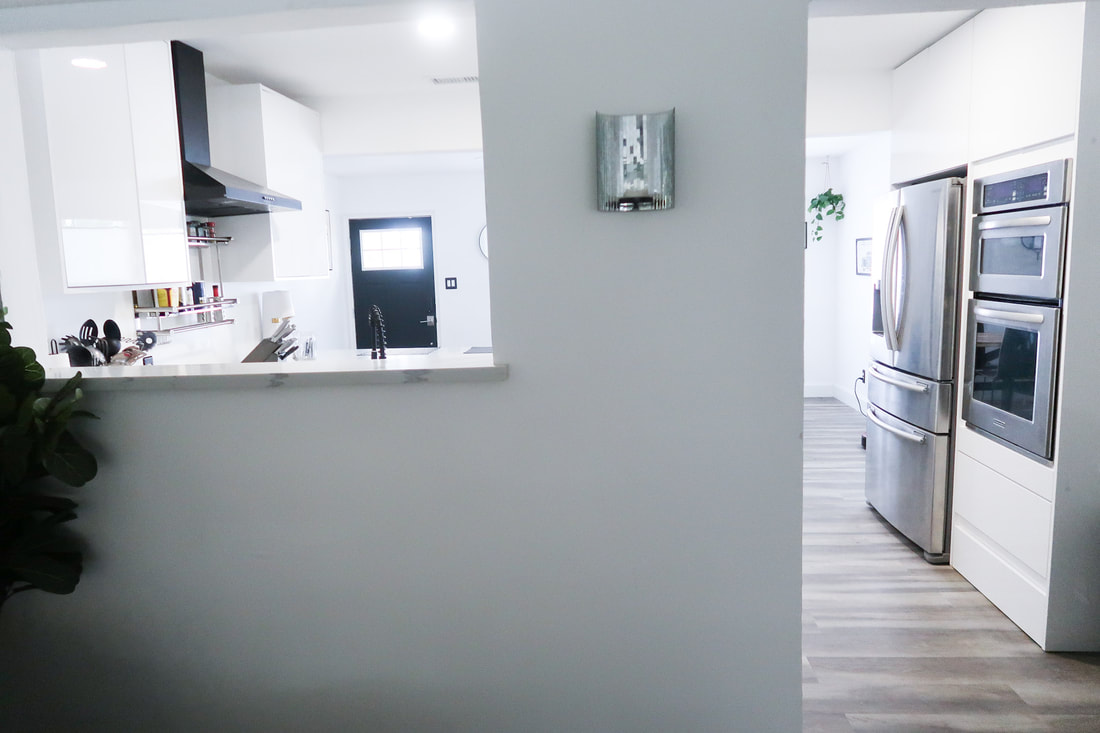
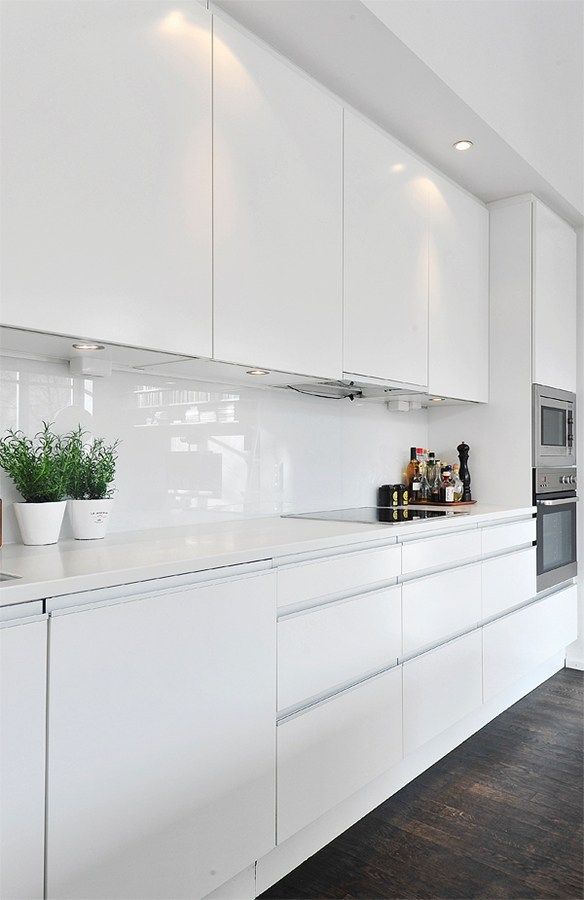
Tada! We took out the big wall separating the front room from the kitchen to open up the space, and I love how bright and open it is. Plus the peninsula adds sooo much countertop and storage space. It feels so much bigger now! We also removed the wall to the right entrance to make the hallway to the bedrooms wider. We gutted the old 70's cabinets and countertops and completely replaced everything. As far as what we had our contractor do, it was a lot more than what we had him do for other rooms in the house:
- remove the walls - install cabinets - install countertops - install sink and create plumbing for garbage disposal - update electric - cut/add recessed lighting to kitchen and living room - install appliances As far as the work B and I did, we removed old flooring (two levels of it :/), laid new flooring and baseboards, painted, and updated hardware. We really wanted a simple, European style kitchen. We both loved the glossy white cabinets, and these were actually difficult to find. Americans are far more interested in the shaker wood cabinets. For the cabinets and countertops, our contractor hooked us up with a killer deal at a wholesale warehouse. It was the complete opposite of fancy and organized (and quite a nightmare), but these wholesalers are the ones supplying material to the fancy kitchen design businesses, so we cut out the middleman and markup. It was way cheaper than even Ikea! It was well worth the headache. For our quartz countertops, we paid roughly $40/sq ft for material and installation, when the average is anywhere between $75-200/sq ft! The old kitchen only had countertops on either side of the sink. I don't even quite know what to do with all of this peninsula countertop space now! All of our appliances were bought secondhand through Offerup. We bought the Kitchenaid dishwasher and oven/microwave wall combo together from someone who was replacing a kitchen in an investment property. They were about 6 years old but barely used. We got the dishwasher AND oven/microwave combo for $900 all together. For reference, a Kitchenaid oven/microwave wall unit alone starts at $3500 new! I really had my heart set on having a separate cook top from the oven, and naturally this is way more expensive than a stove/oven combo. The electric cook top is Ikea but we actually found it for $150 cheaper new on eBay! 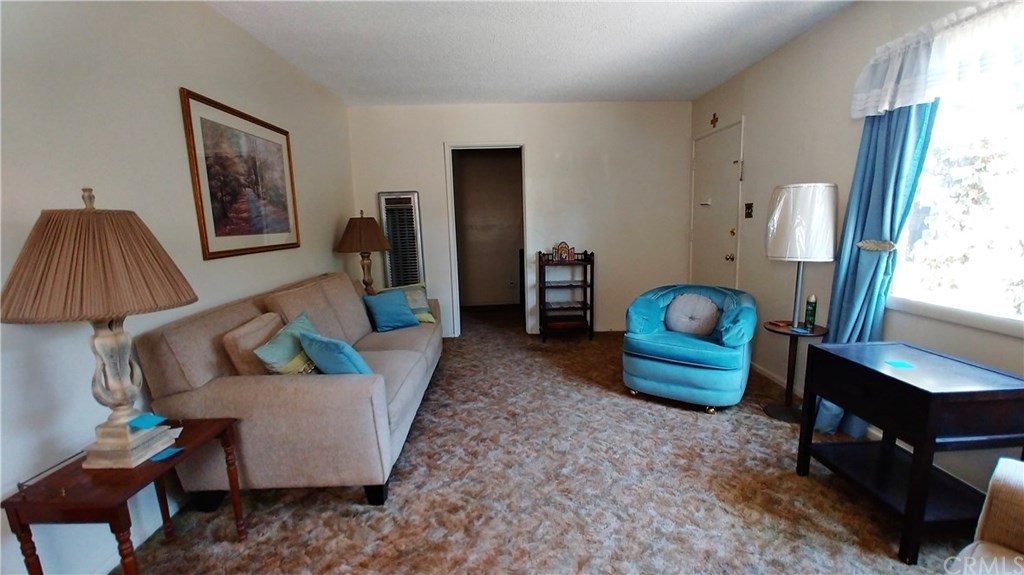
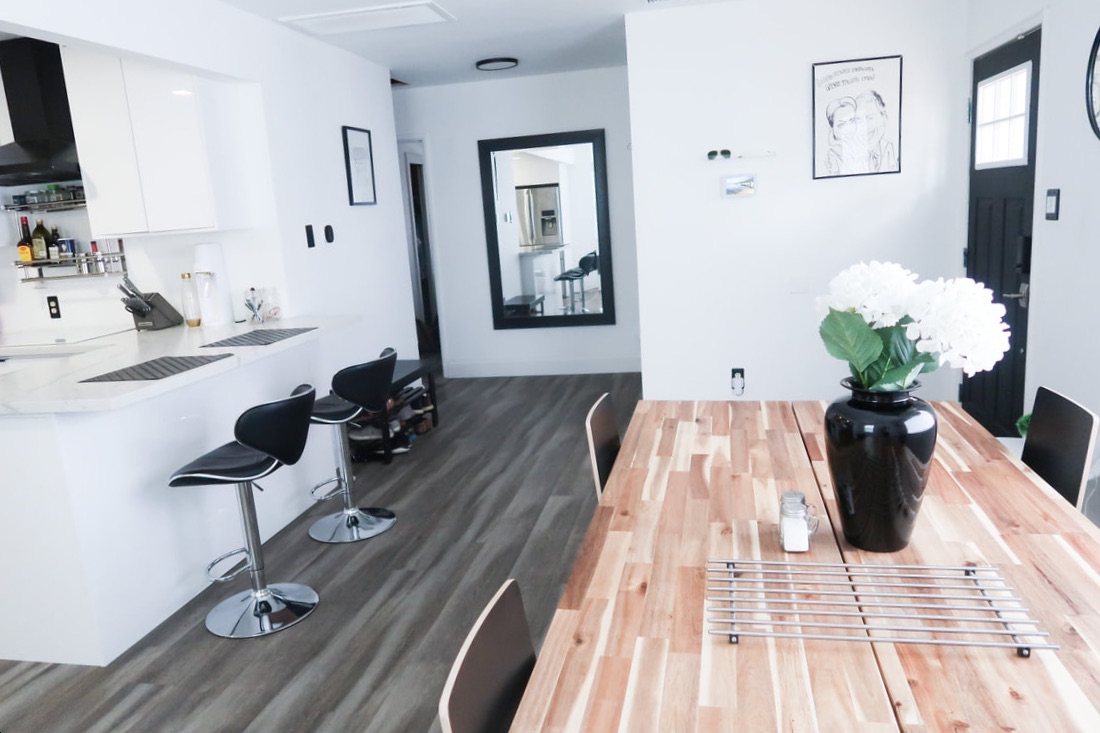
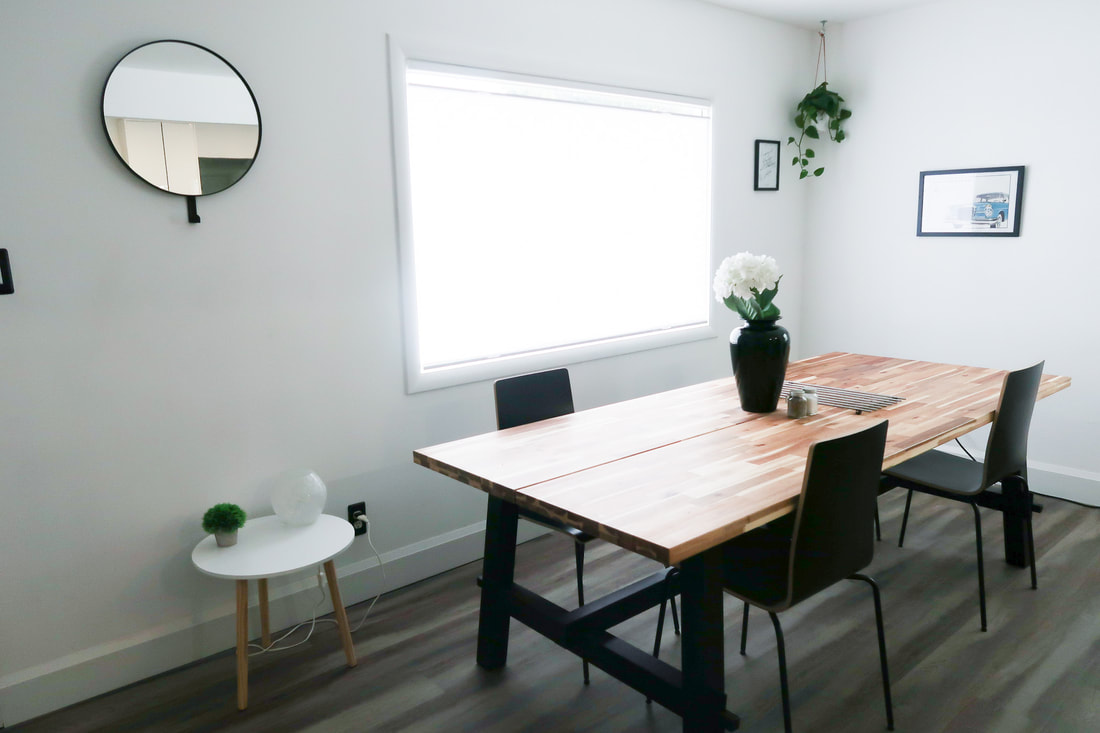
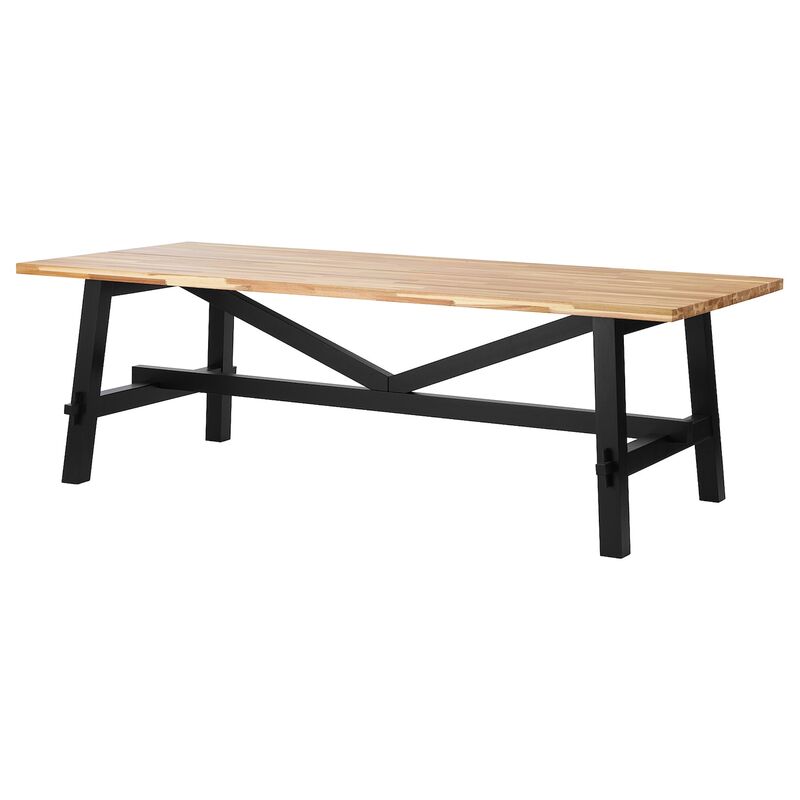
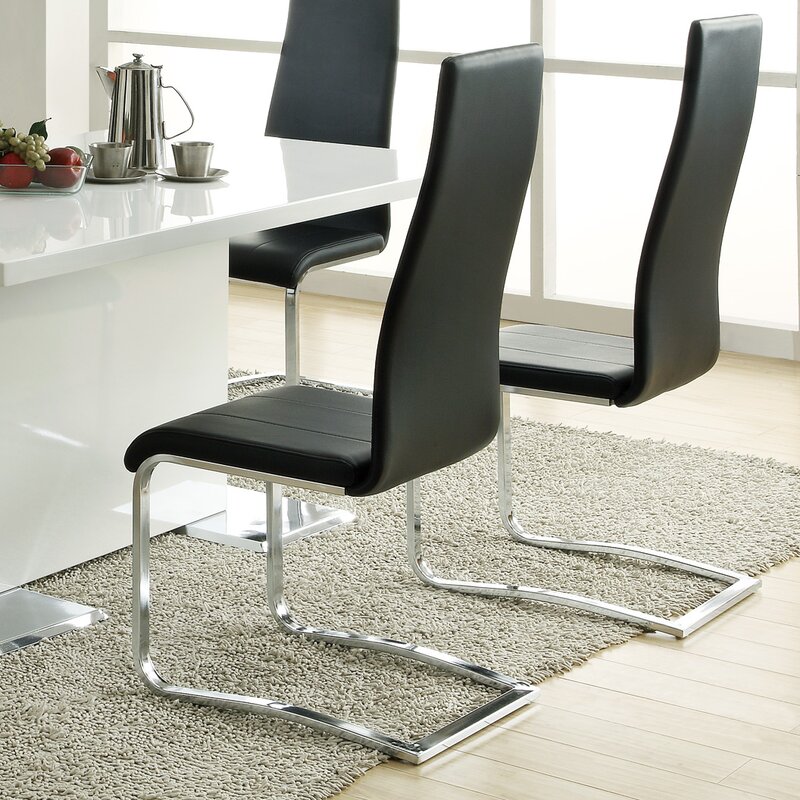
The dining table and chairs are Ikea, and the countertop stools are Wayfair (all new). I was searching so long for a big black wall mirror but they are so expensive, I don't even understand why?? This one got listed on Offerup $40 and I had B drive me that night to go pick it up.
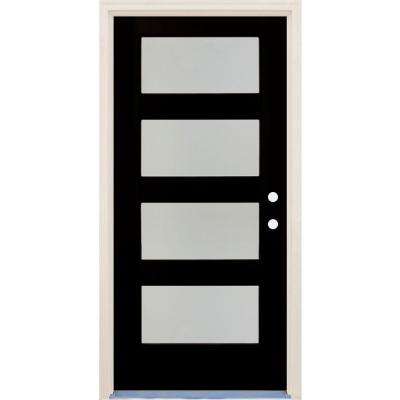
Something else that is surprisingly expensive? Doors! I wanted a modern, European door with the three rectangular windows down the middle, but those are thousands of dollars. What? This one was $300 from Home Depot and originally white, so I just used some leftover matte black paint to make it a little more edgy. Fun fact - the gas company guy told us there was actually a market for those super old (&dangerous&expensive) wall heaters (the one in the above before picture that is in the wall we removed). We listed it on Facebook Marketplace as vintage and sold it pretty quick! We invested in central air for the house and if you had asked me last month when the California temps were 116F, I would tell you that was by far our best investment in this house. I have no idea how anyone lived in this house for the past 70 years without central air conditioning. 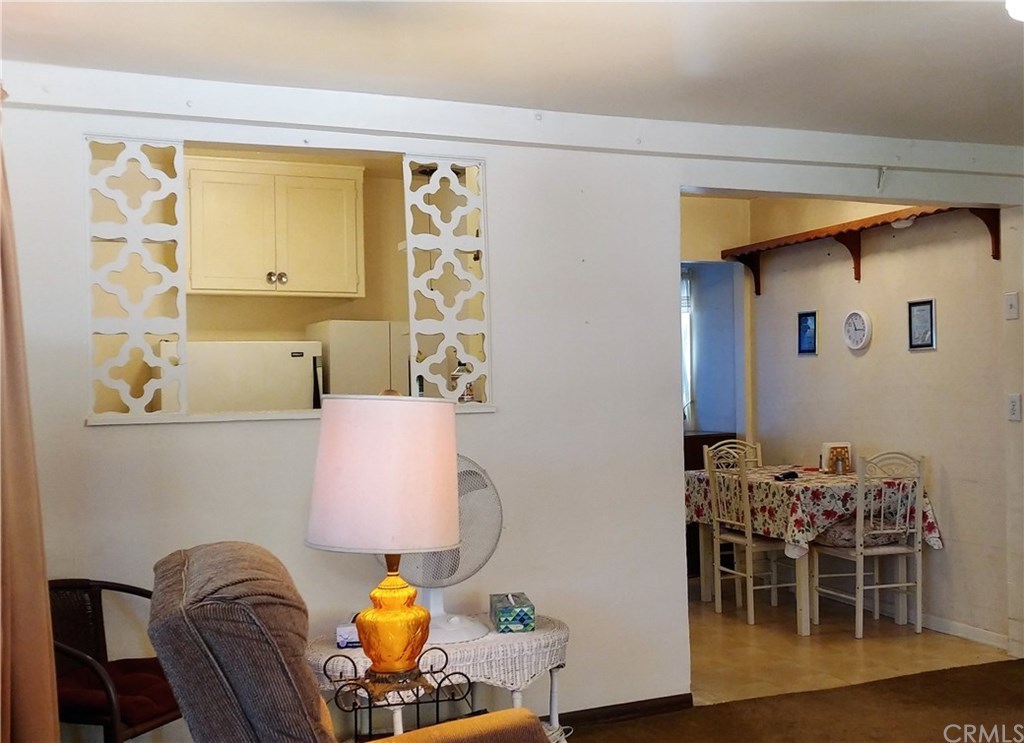
We even had some left over quartz to add to the little window opening between the kitchen and the living room.
Something to think about when designing a kitchen - white is nice and open and all until you have to clean it! Our old house had brown countertops and honestly I just liked being ignorant about how dirty my kitchen was. White does NOT lie and shows every single drop of whatever you spilled. I am constantly wiping and cleaning. Going back I would've looked for countertops that had more gray in them haha. 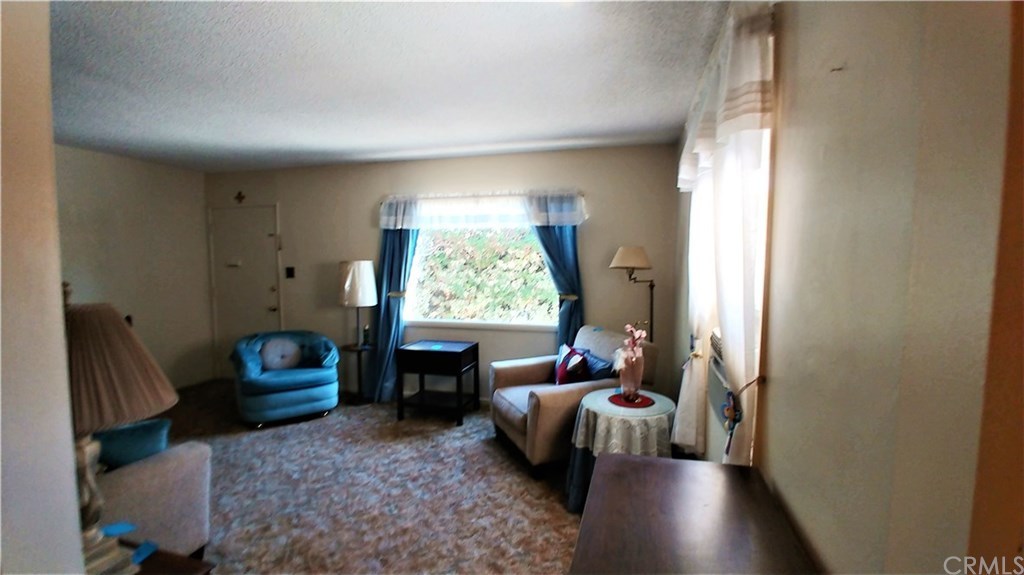
Products We Bought
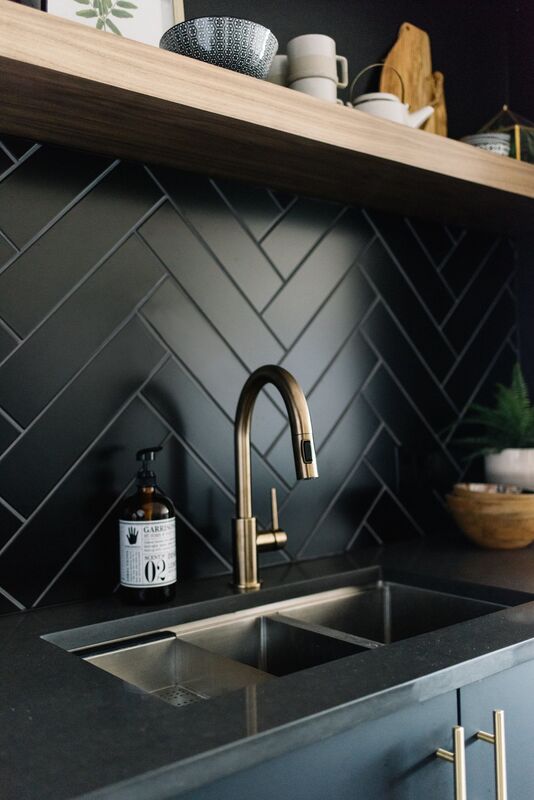
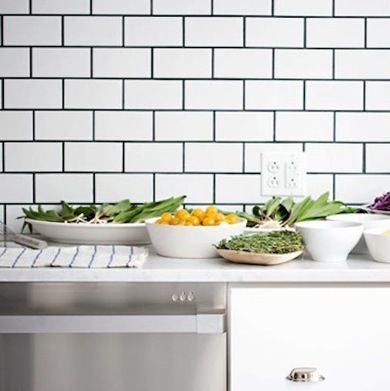
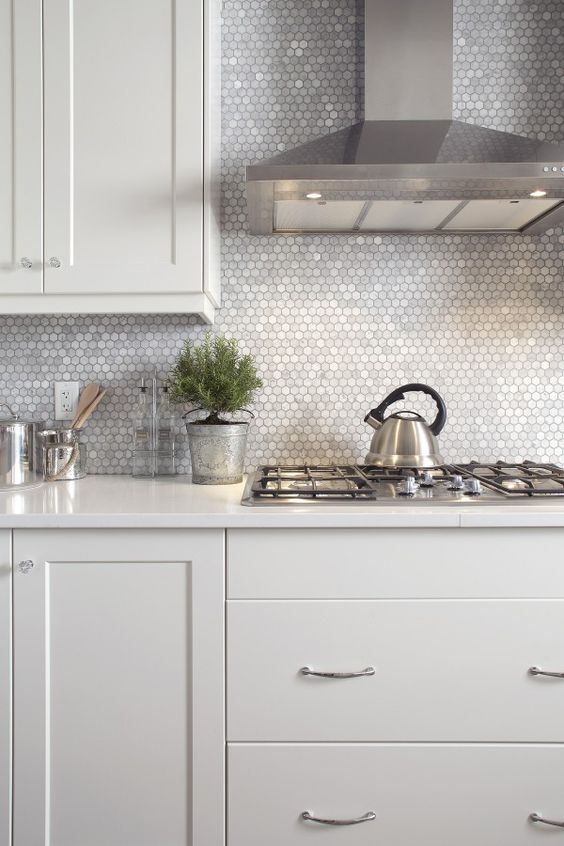
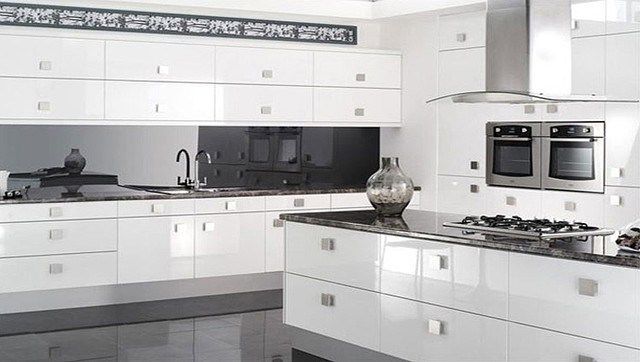
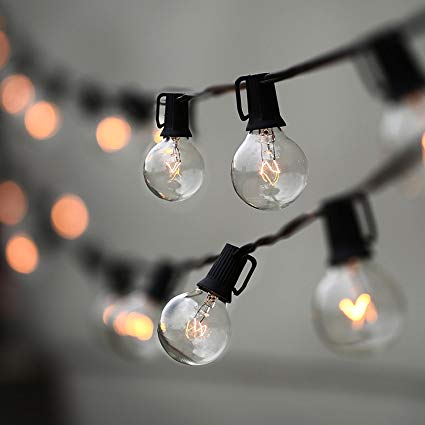
Here is where I need your help! What type of backsplash should we go with? I've added pics of my top three ideas below. Black herringbone, white subway tiles w/black grout, or a silver to break up the black and white?? Comment below and let me know what you think would look best! I'll share the results on IG @fancyfreeblog next week!


14 Comments
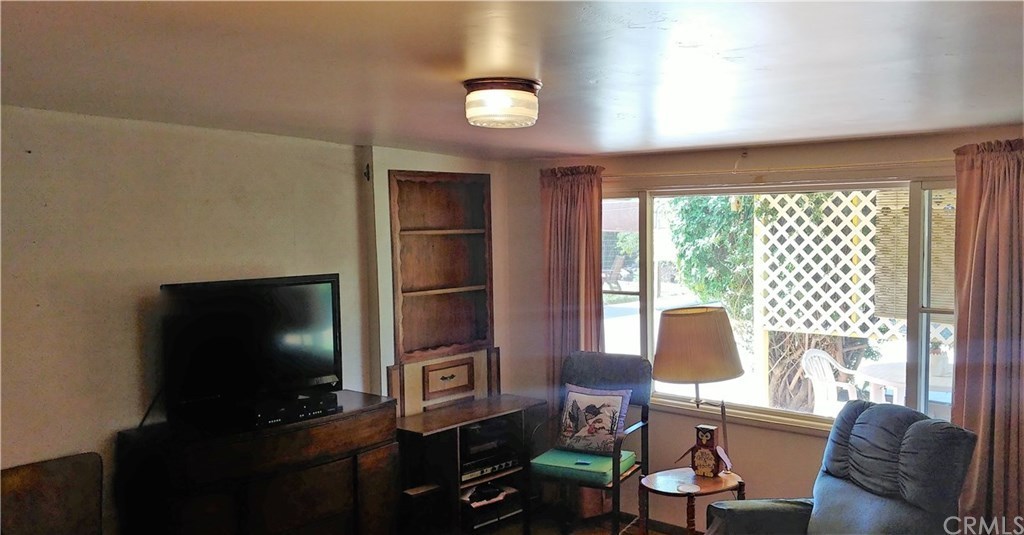
A LOT of time has passed since I last shared some updates on our home remodel. Since we were completely gutting and renovating the whole house, we were in the middle of a lot of projects across a couple rooms when covid hit. For some of our projects we had hired outside help, so that had to be put on pause. And with everything being so up in the air, we wanted to save as much money as possible just in case. Now that things are starting to get back to normal a bit in California we have been getting back to work. The room that is for the most part done (aside from being more decorated) is our living room, which really needed not much work compared to other rooms in the house. Keep scrolling to see the before and after!

Before
After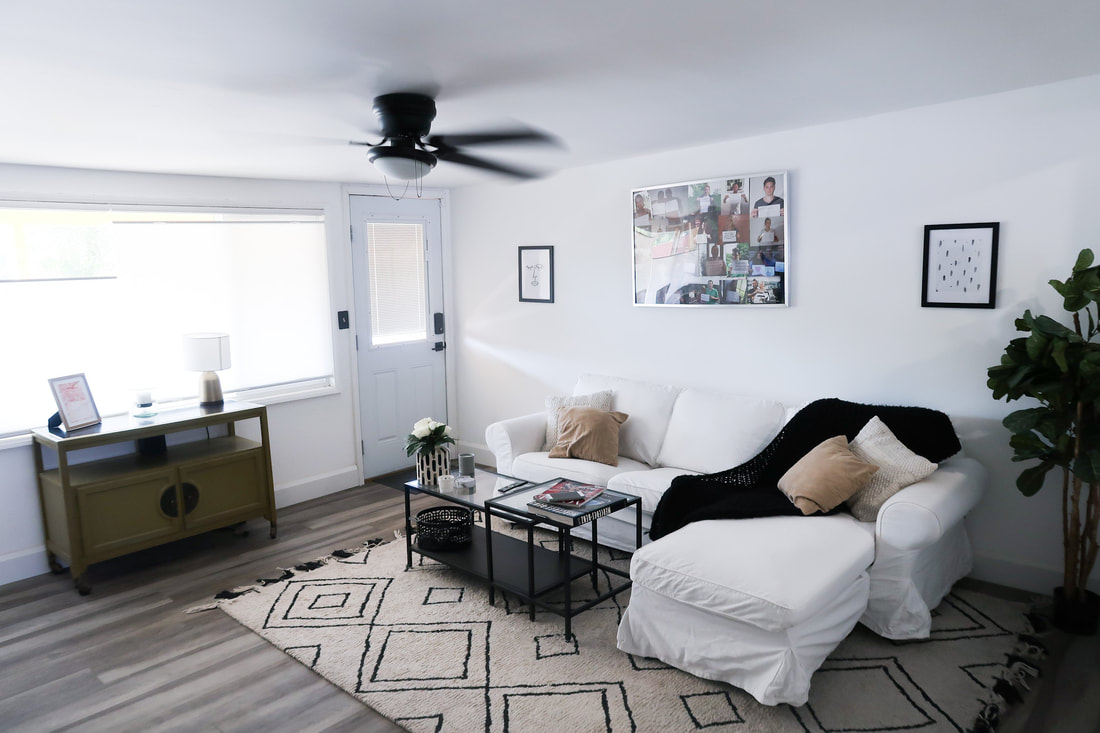
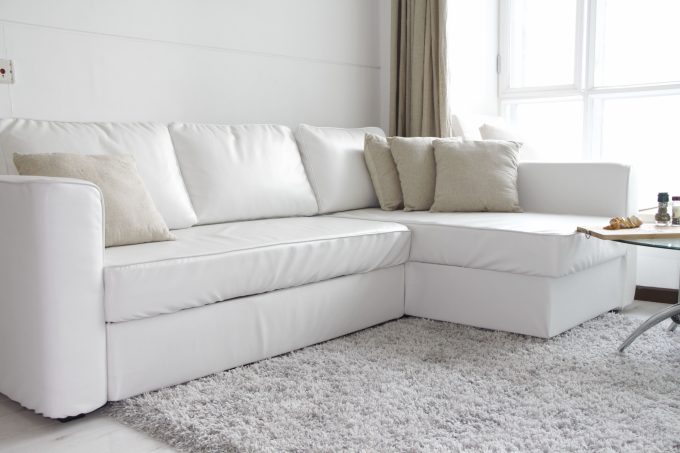
This room was all us. We scraped wall paper, painted, put in new floors/baseboards, and upgraded the fixtures. I think the most noticeable change is the window behind the couch being closed up. The windows in this room were very old and inefficient. As well, the area behind the couch is where we moved out the wall to expand the bathroom (if you haven't seen our bathroom transformation you can check that out HERE) so instead of replacing it with a smaller window we decided to just close it up. The existing window we had replaced with a much more efficient upgrade.
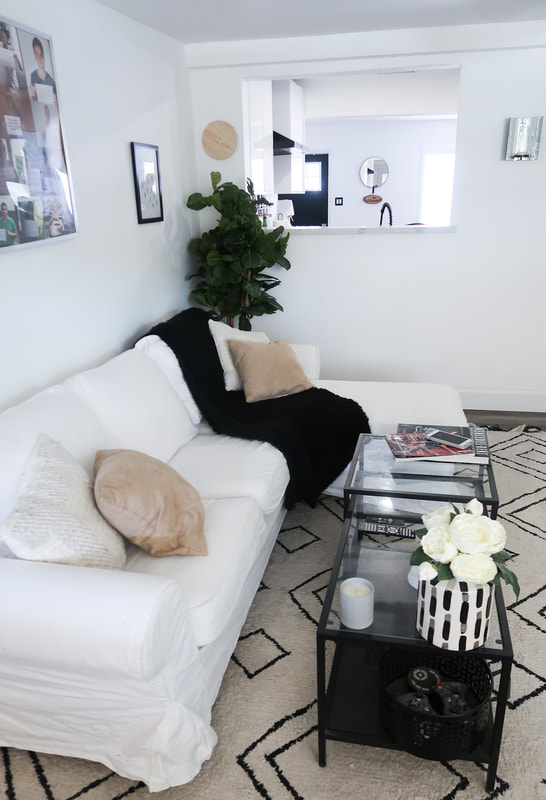
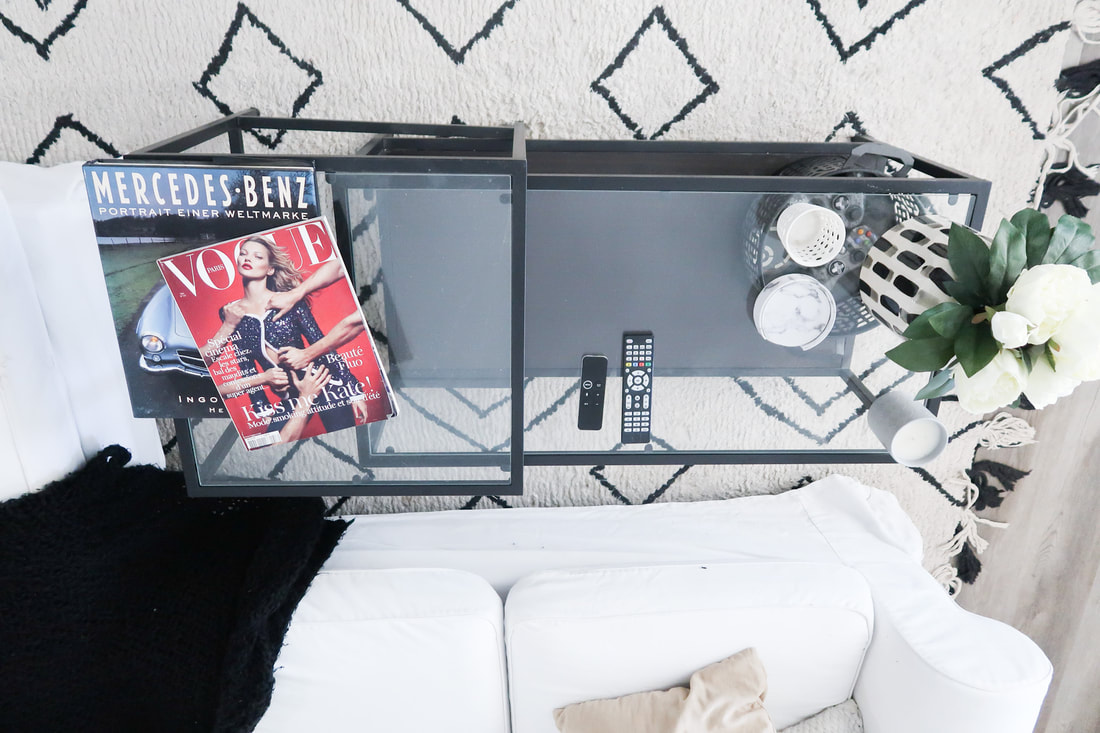
The only new furniture we bought was the two piece coffee table, which we got from Ikea (HERE). The white couch is also Ikea, but not new. We got it barely used off Facebook Marketplace for $300! The tv console used to belong to my parents, and the green rolling cart is actually a family antique. My grandparents bought it in Korea in the 70s!
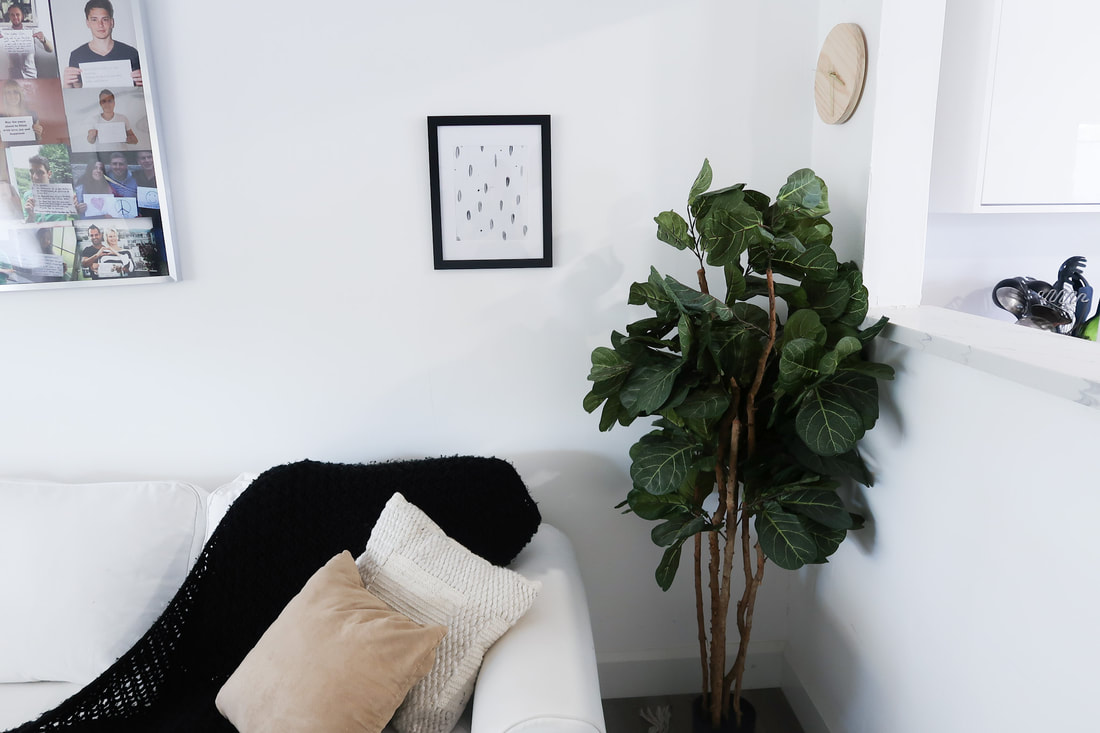
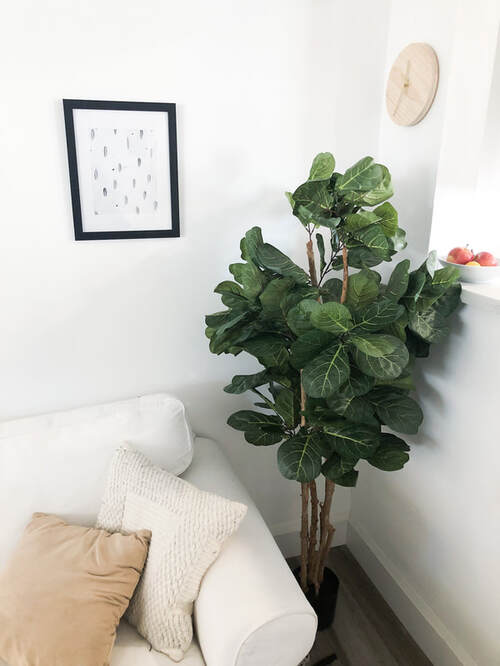
Most of the decor are knick knacks I picked up at thrift stores. I'm super proud of the rug, I also found it on Facebook Marketplace! I only paid $50 for it, and managed to squeeze this 9x12 ft rug into the back of a crossover suv all on my own! These rugs are regularly $300 so I couldn't pass it up. The one piece I did buy new for the room is the fake fiddle leaf fig tree. Many I found were pricey, but this one was only about $70!
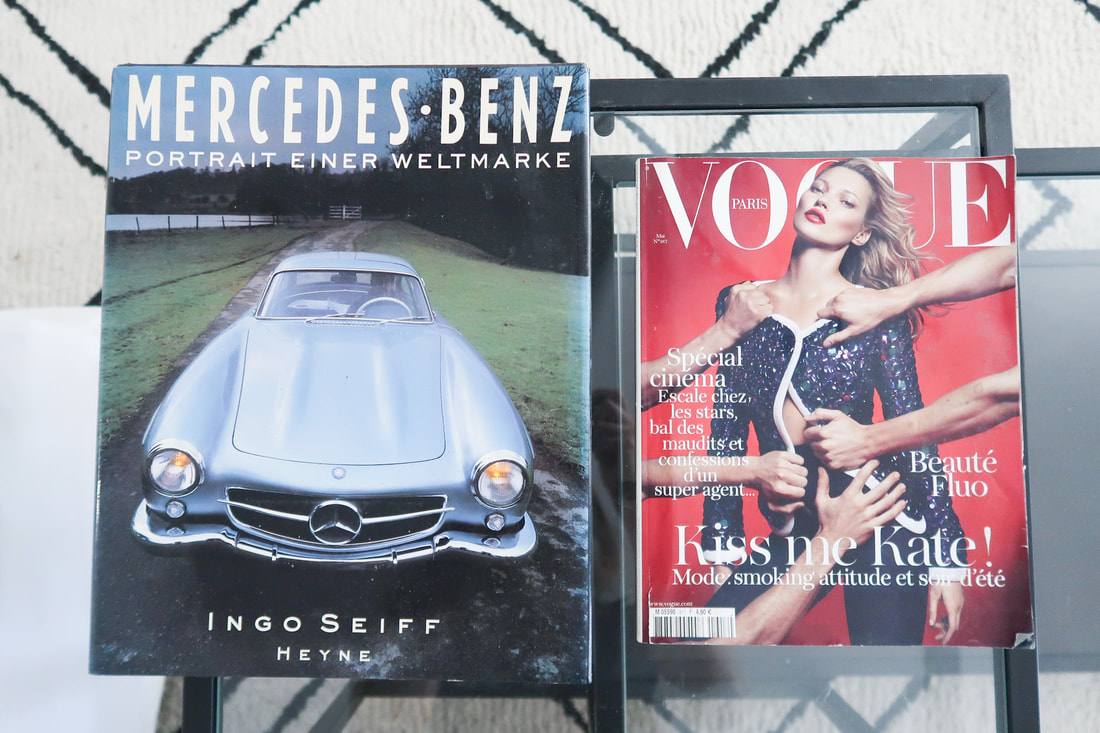
These have been our coffee table books for years. The Mercedes Benz book was my husbands from Germany, and the Vogue is special to me because I bought it when I was in Paris back in 2011 (the trip where I met my now husband). I love the coasters I bought off Amazon, they have a marble design and are leather so they hold up really well. Plus they have over 1200 reviews and almost 5 stars!
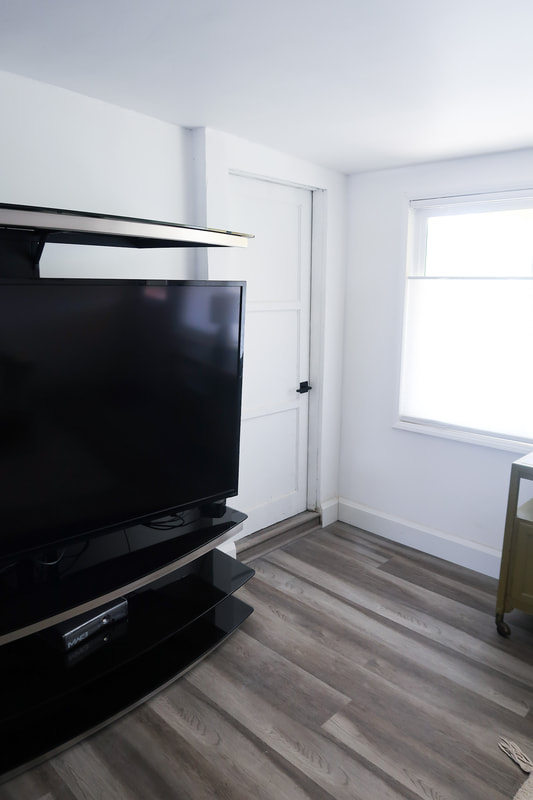
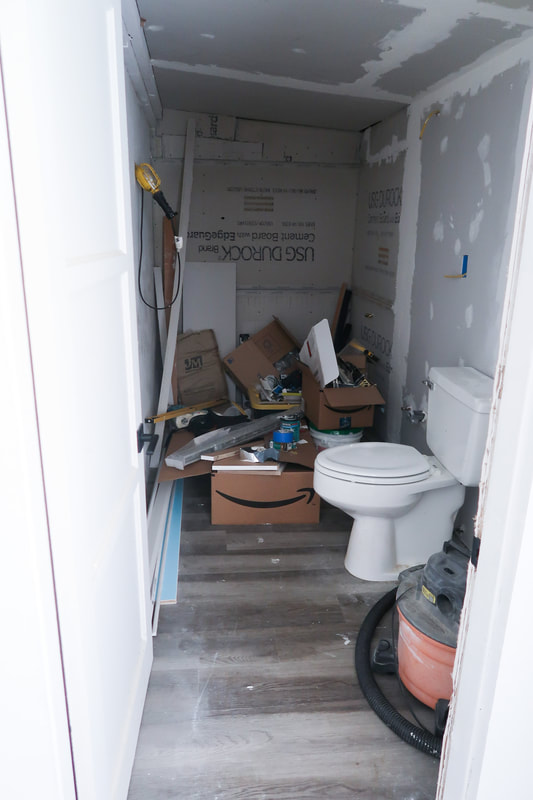
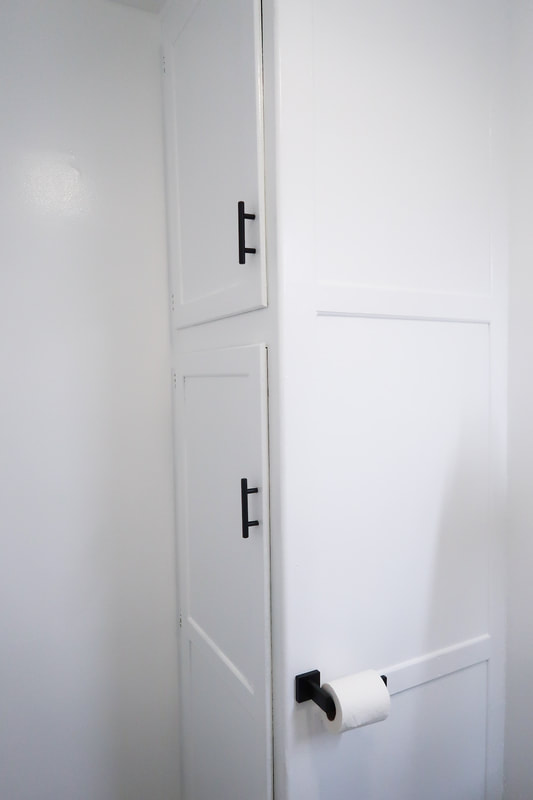
As far as what we are working on now, our goal is to get this old toolshed off the living room transitioned into a bathroom (with shower!) by Thanksgiving. The door to this bathroom is next to the TV. If you look at the old pictures of the living room, the door into this bathroom had a bookshelf attached to it, so it didn't look like a door at all. There was actually a door to the backyard/outside that we closed up behind the toilet.
As far as the room I am most excited to share, the kitchen, we should be getting that room wrapped up very soon! We ordered our cabinets back in February, but one *single* cabinet was on backorder and was supposed to arrive by April. Due to covid, it got pushed back until August and there was actually a lot our contractor couldn't build because of this one cabinet. But now that we have the cabinet our guy is coming back in to finish the kitchen very soon! I'll be sharing that hopefully at the end of this month :D

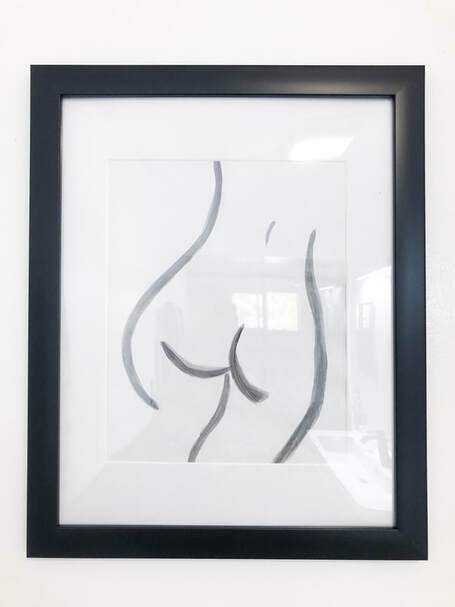
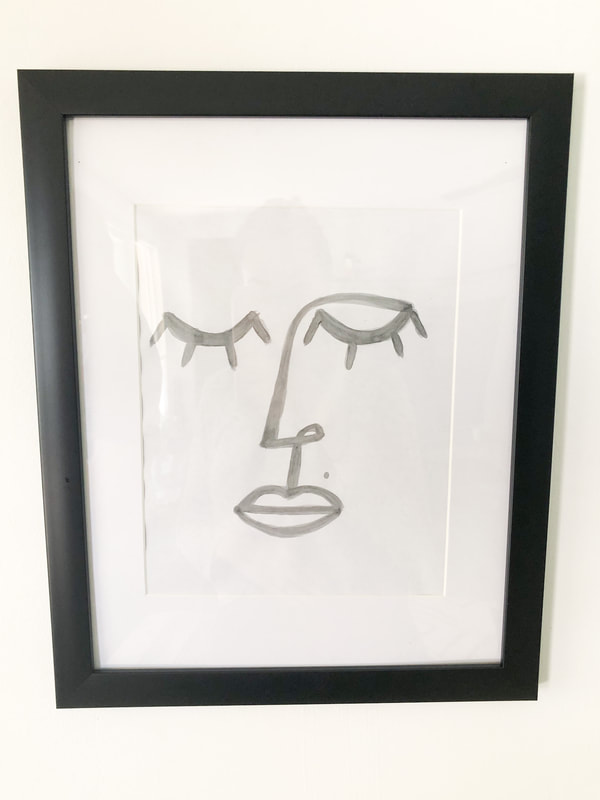
While other states have been open for weeks, the lovely state of California is still very much in shelter in place. I'm definitely bored, so what have I resorted to? Painting butts.

One of my favorite bloggers, Kathleen Barnes/Carrie Bradshaw Lied, shared on her instagram about this project she was doing to keep herself busy, and I loved it! I had been researching modern / abstract bathroom art, but redecorating is EXPENSIVE so I loved seeing a DIY project I could try. I definitely recommend practicing and drawing out a sketch butt with a sharpie before attacking a piece of paper with paint. Once you break down the picture into single lines, it's actually pretty easy! When it came time to paint I just traced my best sharpie practice butt. (I've never typed "butt" this many times and I'm loving it.) I think it makes for cool modern bathroom art!
The only paintbrushes we had were for walls and big paint projects, so I ordered this 10 piece set off Amazon for $7.99. I also got this frame set, 10 frames for only $33.99! Thats only $3.39 a frame, which is a killer deal. Great for a collage wall!
I had so much fun with the butt (lol) that I decided to get all artsy and take a stab at a few more paintings! A number of them went straight into the bin but I did like how two ended up! Hubs said we could hang them up in the garage (lol) but I convinced him to hang them in our living room. :)


This bathroom has been under construction since we moved into our home IN NOVEMBER. It required a complete overhaul, including moving walls and pipes. For being such a small space, it has been the most demanding and time consuming room to remodel. Get this - there was a time when there was NO tub/shower, NO sink, and we had our dishwasher taped to the toilet. #strugglebus
The original bathroom was much smaller, had a weird (and painful to walk on) rock floor, and was GREEN. Before: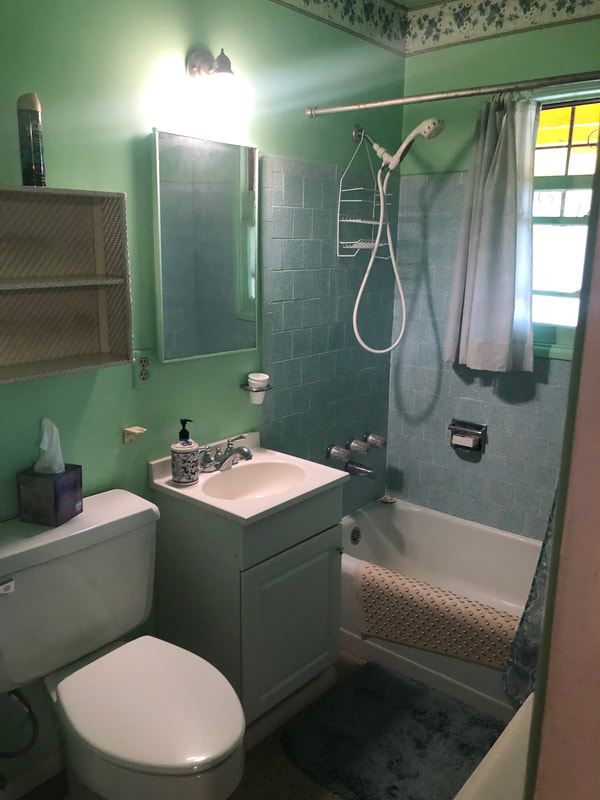
After: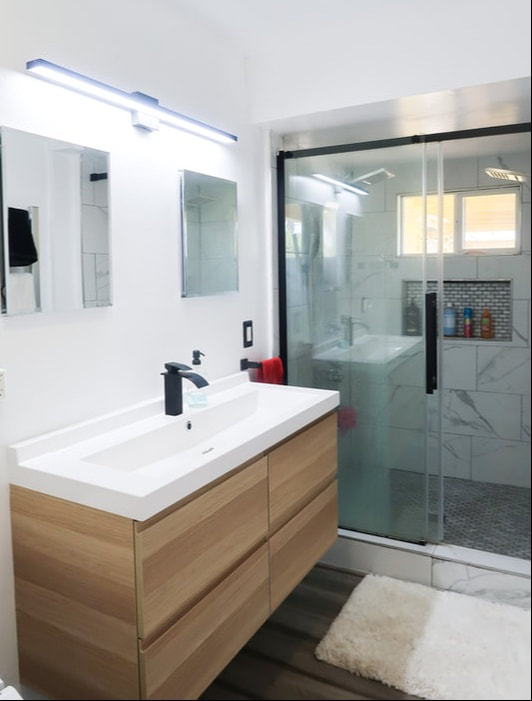
As far as the work we (mostly hubs) did ourselves, we ripped up the floor, patched the cracking walls, painted, laid new floor and baseboards, installed new vanity & toilet, added a fan/heater, swapped out the light fixture, updated existing outlets with GFCI, created two new outlets, and updated hardware.
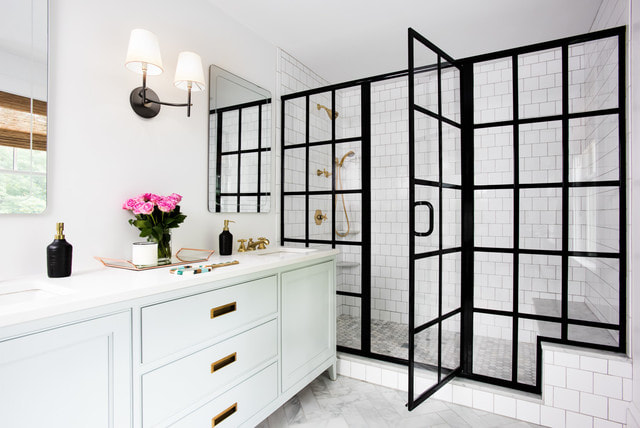
We had our contractor move the wall with the window back about 5 feet to create space for the shower, removed the tub, and basically built and tiled the entire shower. The old bathroom ended where the new shower starts now. I can't believe the single bathroom in this house was so small! 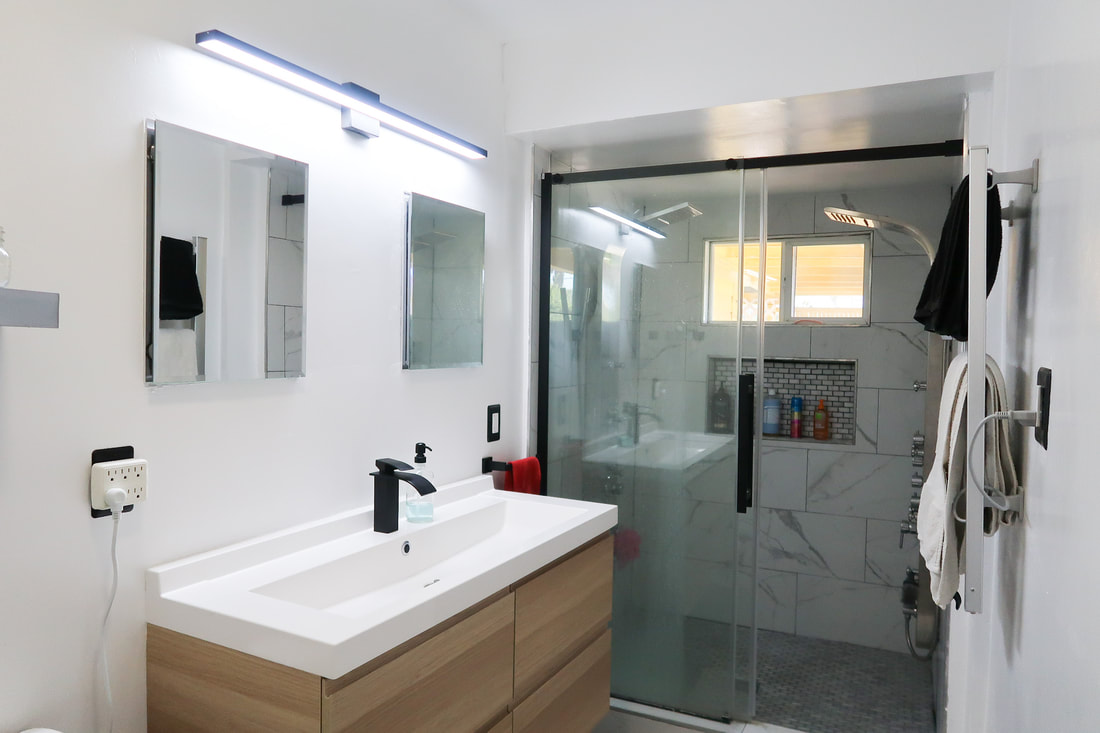

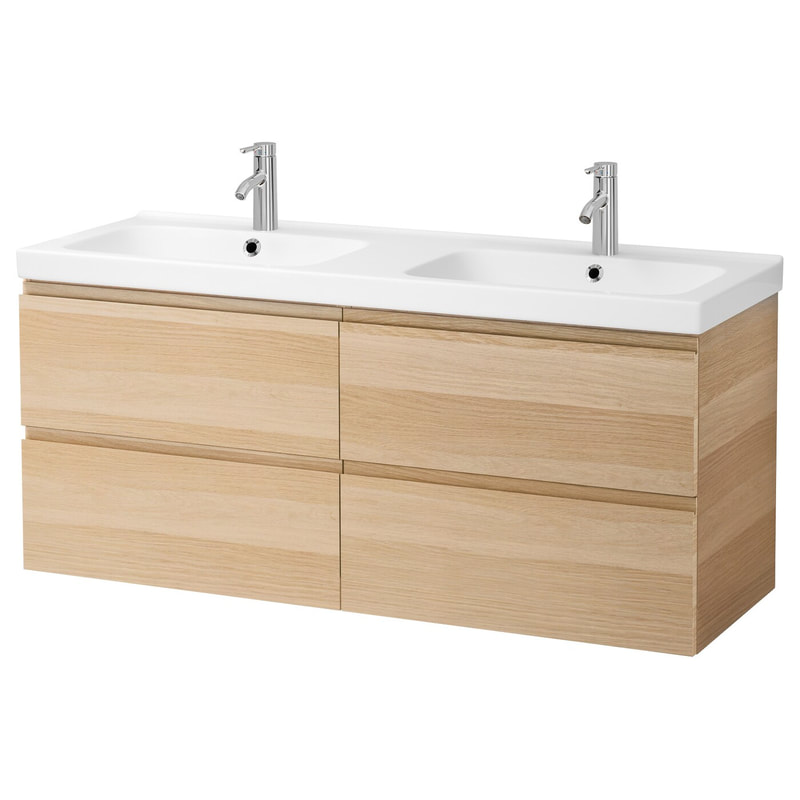
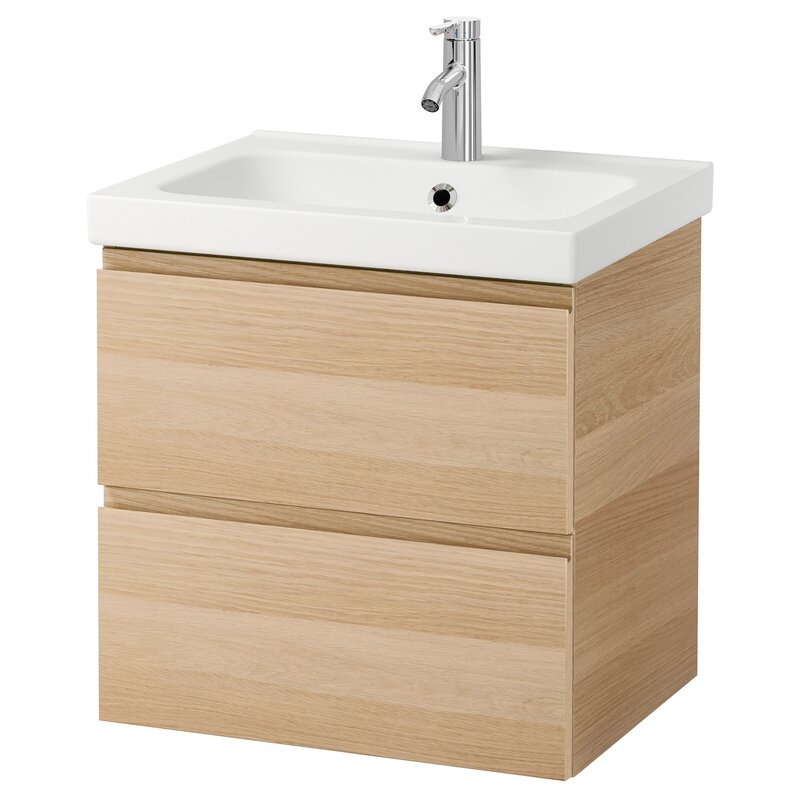
The vanity and sink we bought from Ikea. We had originally wanted a double sink, but this big single bowl was on clearance and we just couldn't justify spending hundreds more for a split bowl and an extra hole for the faucet. But in all honestly we are rarely trying to use the sink at the same time, so no biggie!
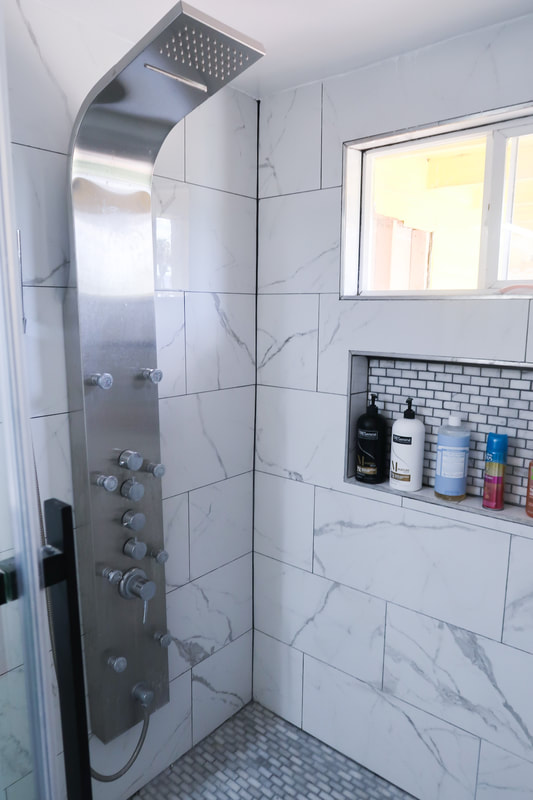
All the shower materials (tiles & shower doors) were bought from Lowes. I love the shower, but one thing I would've changed would be to have used white grout on the walls vs the black grout. I think the black grout turned out great with the tiles on the floor and in the shelf, but for the walls the black grout just magnifies any imperfection with the tiles.
This is the same shower panel we had actually bought for our first house, and we knew we absolutely wanted the same one for our new shower. All the nozzles are great, and it also has a waterfall feature. 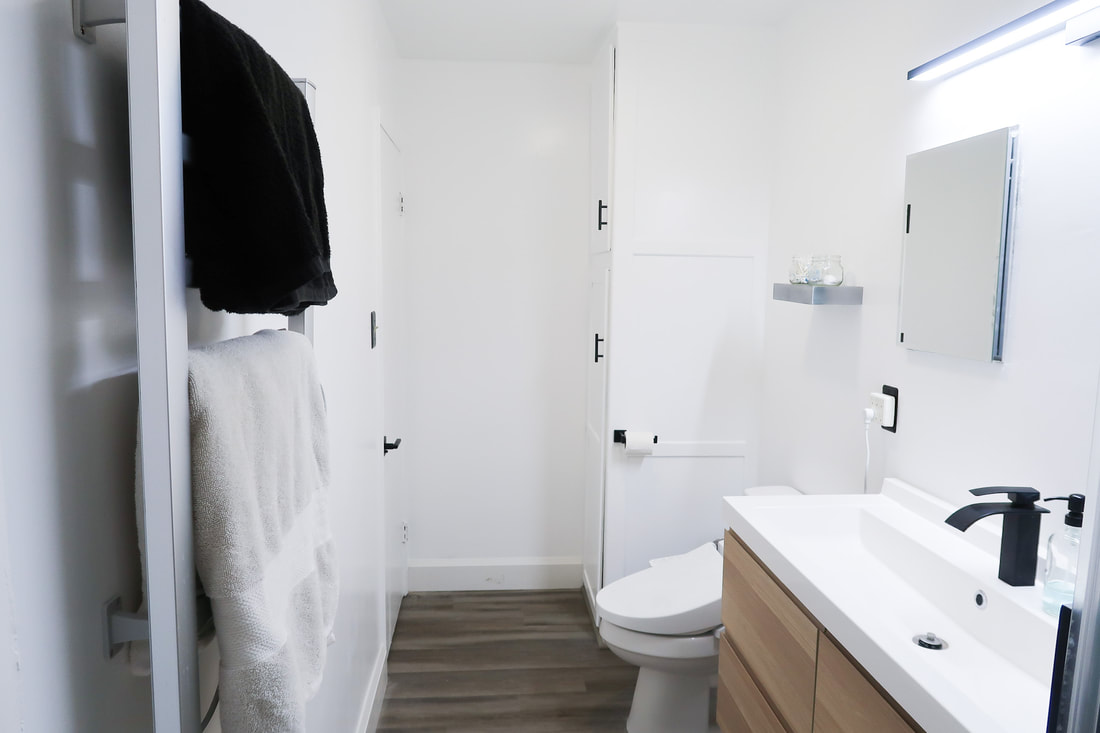
A lot of the hardware we bought for the bathroom was through Amazon (they often had the cheapest prices!) plus they shipped so quick. One thing we found that ended up saving us a lot of money on the remodel is that a lot of items on Amazon have the option to buy returned/open box items. But they aren't items that were returned for being broken/defective. We did this for the shower panel, and ended up saving $100!
Thanks so much for reading, I can't believe we are finally to a point where I can even share a corner of the bathroom! If you have any remodeling experience or tips, help a sister out in the comments below!

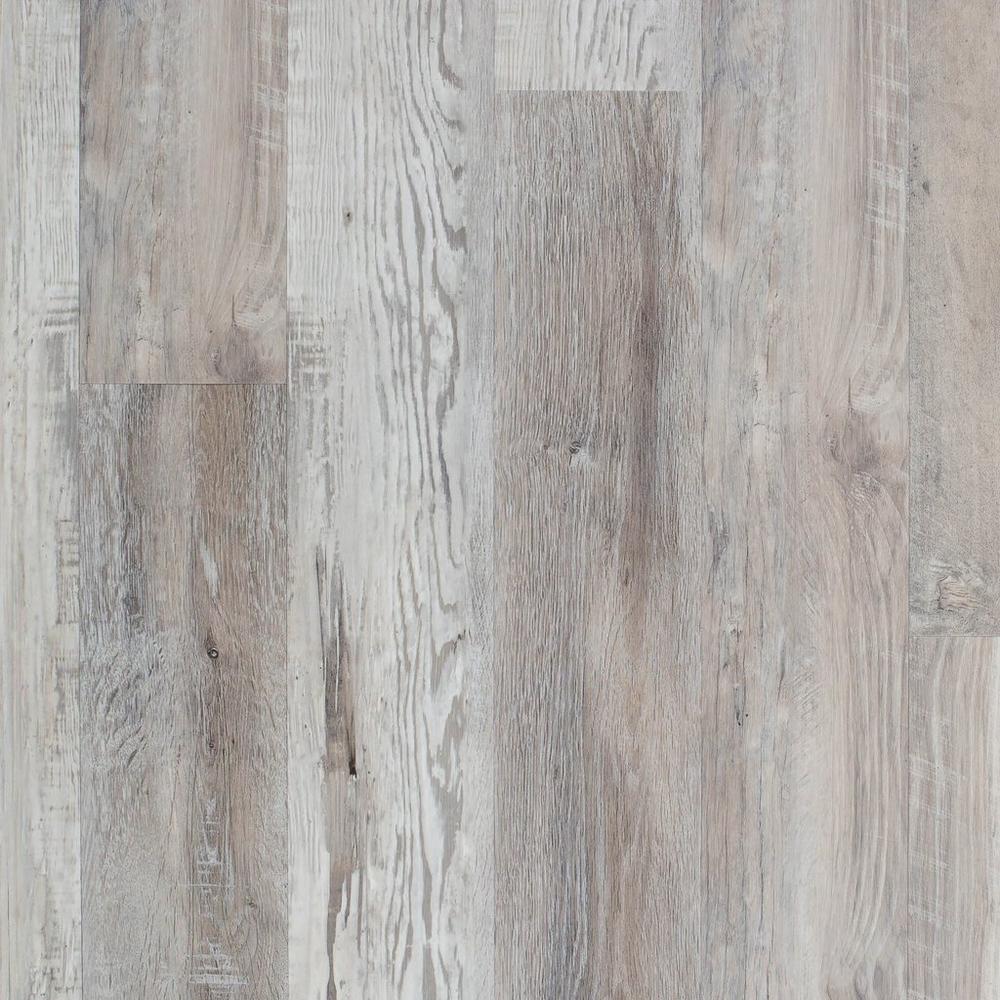
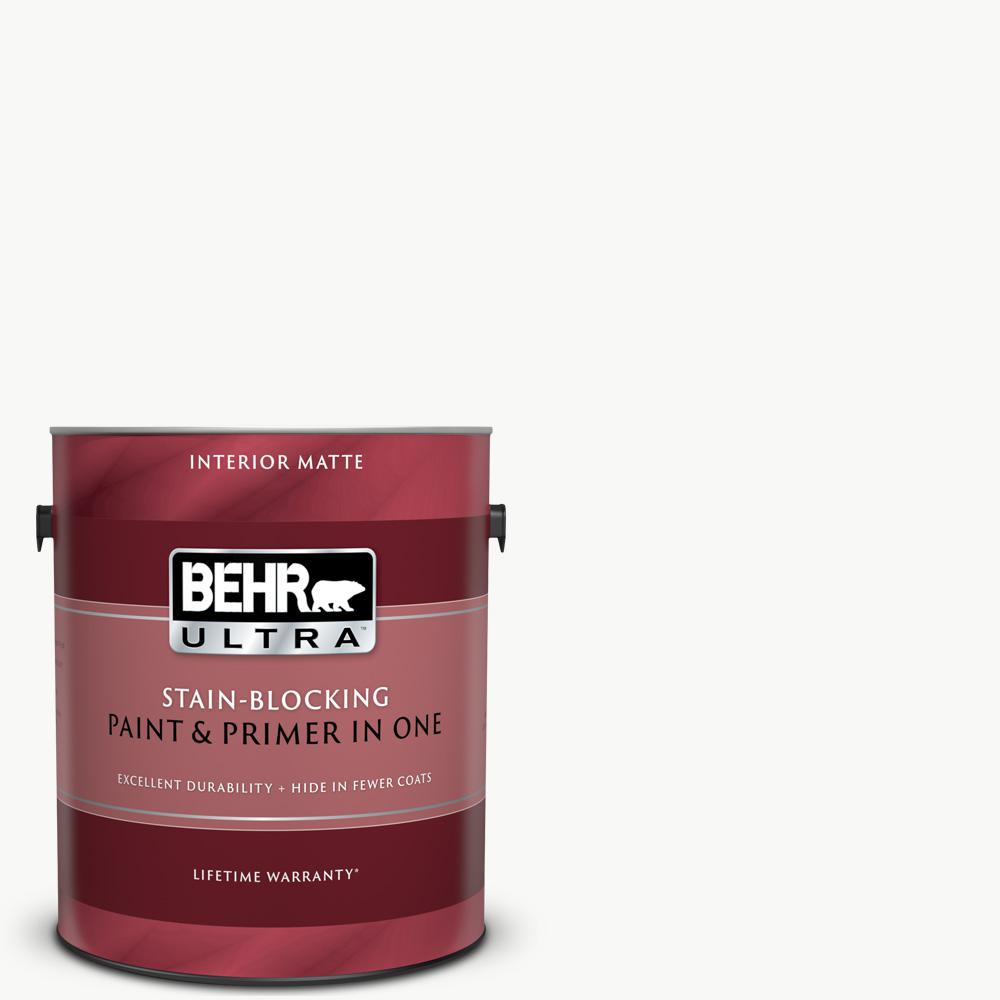
 Happy 2020! I've been MIA the past few months because we have just been up to our eyeballs in remodeling our new house. It's going slower than we expected, but it is slowly and surely coming together. I thought it would be fun to share the journey with you guys and maybe our experiences can be helpful to you! I wanted to start by showing you where we started from (wait until you see the color of the bathroom..!!) I'm also sharing some inspo photos to give you an idea of what we want to do with the space. Overall we are going for a simple, modern look with a simple mix of white, black, and wood. Keep scrolling! Exterior 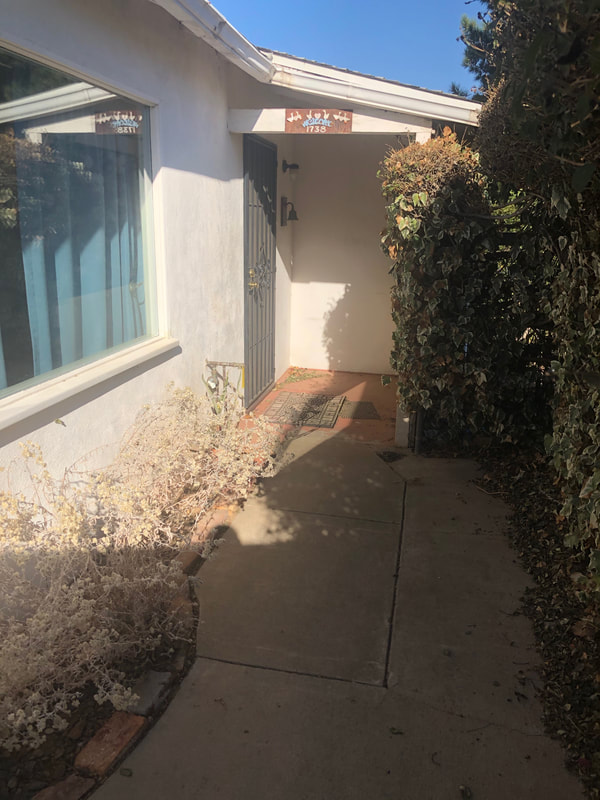 InteriorSo pretty much through the entire house we are keeping the same flooring and paint for consistency. For flooring we went with a nice gray luxury vinyl plank, which I had never heard of before we started researching flooring. It's thick and waterproof, which means we can also run it through bathrooms and kitchen. I also had my heart set on a high base board, and we found a great moulding at Lowes that is 6" high. For walls we are going with a simple ultra pure white. 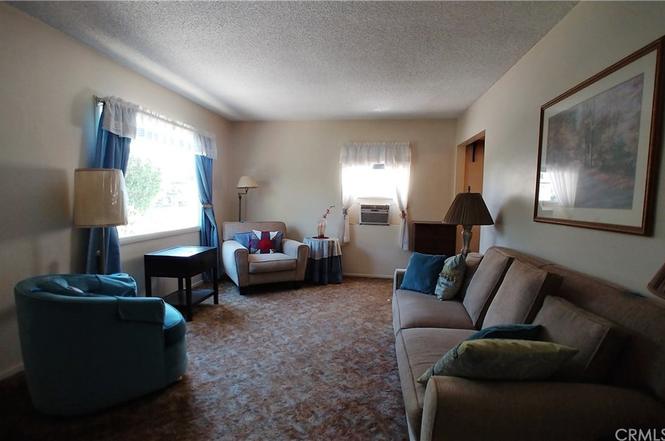 For the kitchen we are actually going to be removing the wall behind the stove to open up the space into the dining room / front room. We will have an island where the stove is instead. 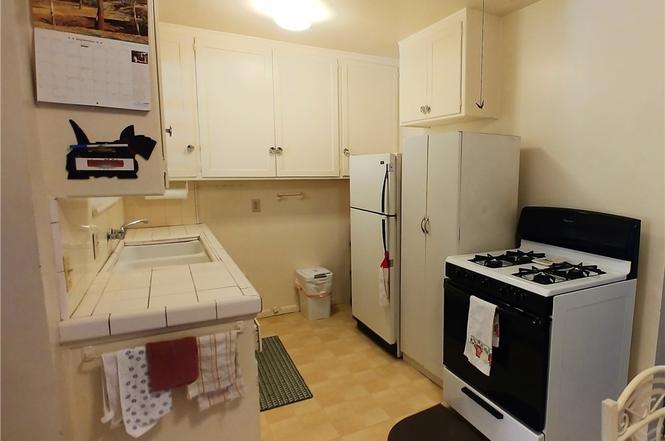 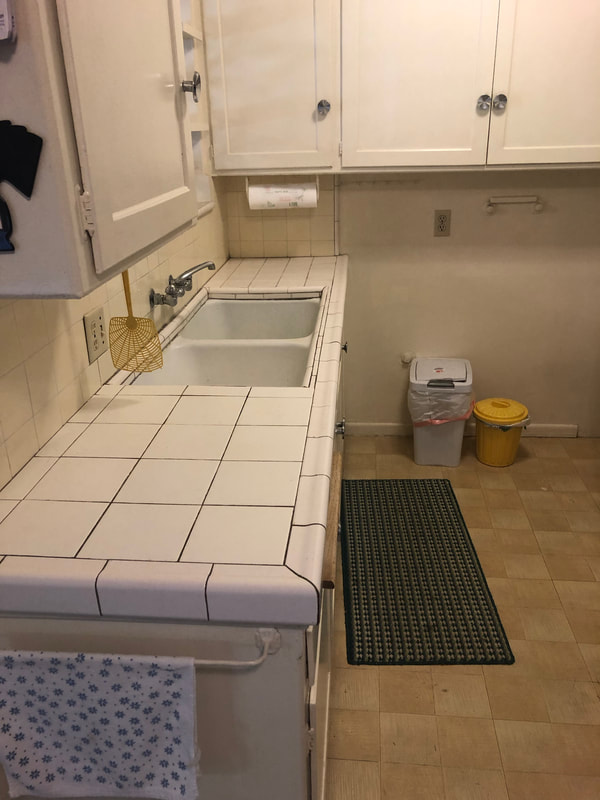 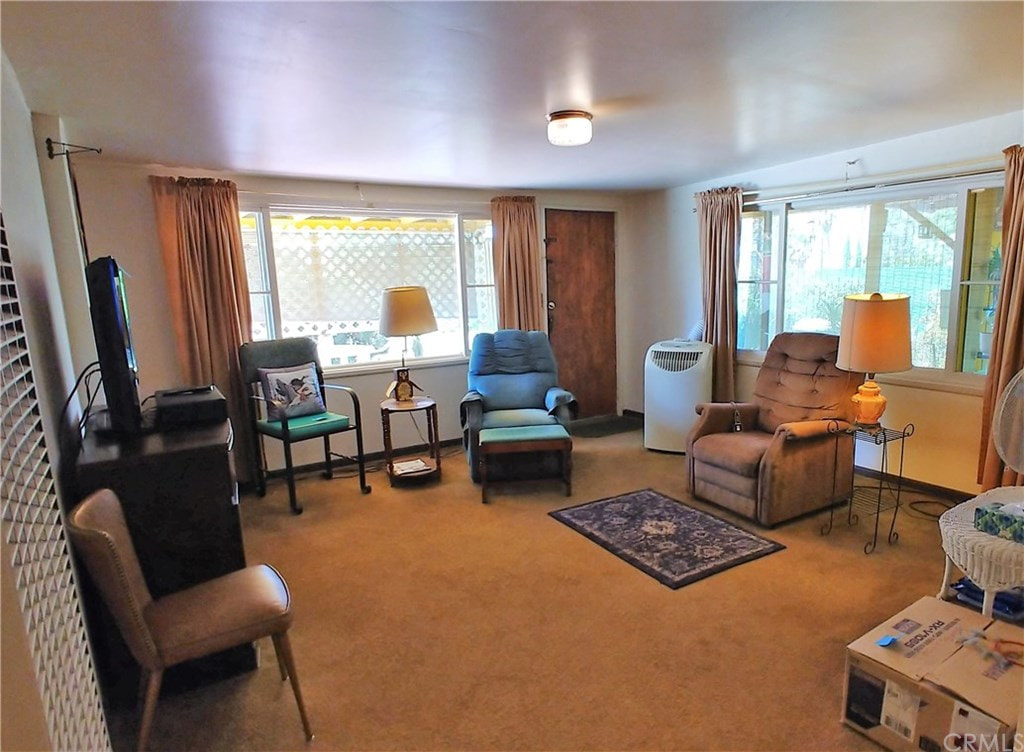 For the bathroom, we have actually removed the wall with the window and moved it back a couple feet. We are in the process of building a walk in shower in the new space and will put a double vanity in beside it. 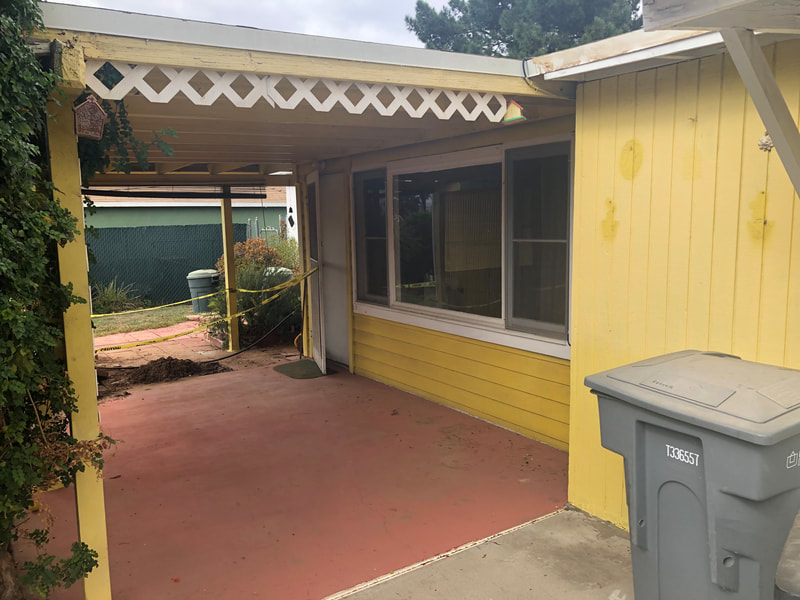 This was previously utilized as a tool shed, however with an entry door into the living room (that looks like a bookshelf, how cool is that??) we have decided to convert it into a second bathroom! We'll just close up the exterior door. As far as design, we are going to just make into a mini version of the master bathroom. 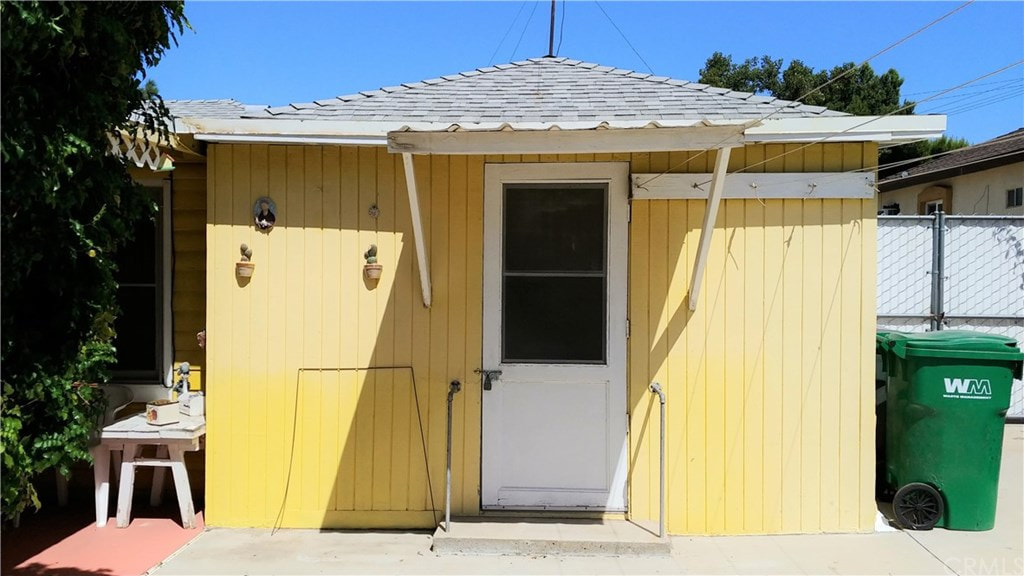  As you can see..we have a LOT of work ahead of us. It's already going slower than expected, but we still have hope one day we will have a nice house, just the way we want it. Have experience with home renovations? Leave some tips + words of encouragement (lol) below!  |

Live for luxury? No trust fund, no problem!
Join the fancy free journey as we seek the finer things in life, sans millions. Press
- Marie Claire, September 2016 Categories
All
Archives
October 2022
|


 RSS Feed
